Howdy there, fellow artists, Blender enthusiasts, and gamers alike. I am a primarily 3D artist with a bit of an obsession with non-photorealistic rendering (NPR) in Blender. Like many, I also have a hobby of playing video games, but I often get more lost admiring the graphics and artistry than I do playing the game itself.
When Genshin Impact (原神 ) took the world by storm with it's beautiful anime-style graphics and character design, I fell in love with it. The incredible talent behind it, the thought put into every detail of its design—I spent hours studying it. What caught my attention the most beyond any shadow of a doubt was the character shader.
So naturally, I went straight to work replicating it in Blender.
For those interested, you can buy the shader for EEVEE from my ArtStation store: https://www.artstation.com/marketplace/p/9nrrR
Elements of the Shader
If you know about real-time shading in video games—particularly in mobile games—it may come as no surprise that most of the shader's elements are faked both for better performance and for full control over art direction to get that perfect cel-shaded appearance. Let's get into it:
1 – Real-time Shadows
First up, the most basic element. As expected, the game shades characters with a very basic real-time shadow in any lit area when not in shadow, but there are a few key points to this:
Cel-Shaded
This is the most basic functionality of my shader. Of course, models use cel-shading to create that signature style reminiscent of anime, but there's a twist—more on that a little later.
Hand-painted Shadows
It's nearly impossible to achieve some of those stylized shadows with only diffuse shadow, though. For example, these are the shadows under some characters arms or neck, on clothing seams and folds, or that make up that signature anime hair shading effect (see below). Many of these shadows create an effect of ambient occlusion as well. These shadows are not rendered in real-time but are painted into the texture itself. If you're making an original character, be sure to add these lines for some contrast and extra detail!
No Self-Shadowing
In almost all cases, a character's model (and their accessories) does not cast a shadow on itself. The shading is determined entirely by the position of the light.
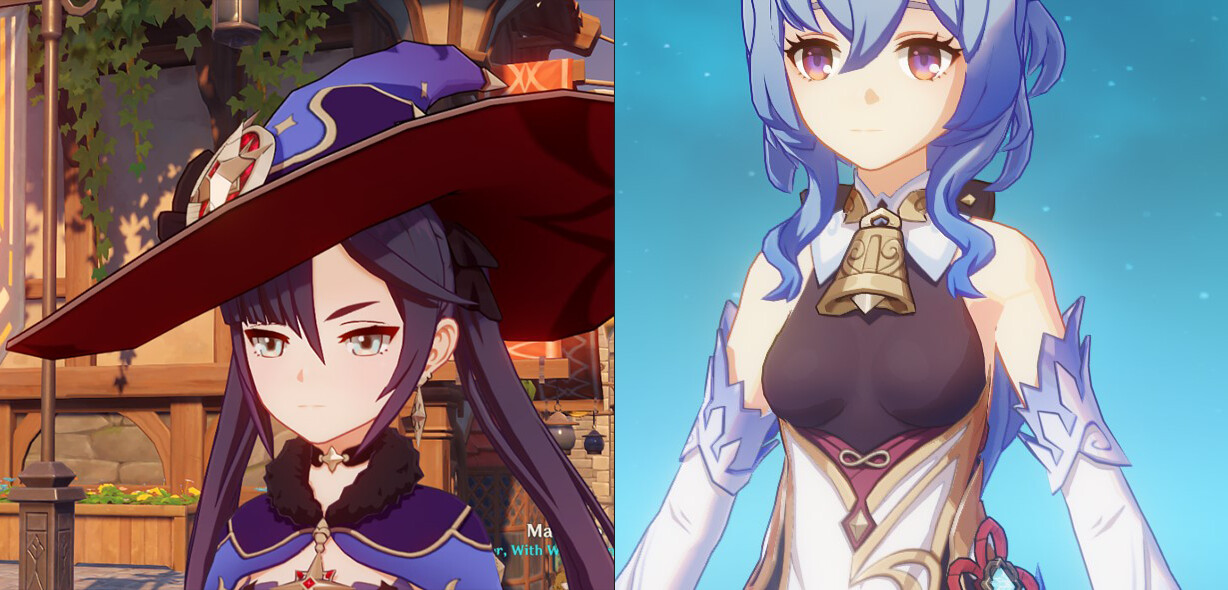
Take Mona's hat and Ganyu's arms, for example. While there would realistically be shading on Mona's face from her large hat brim or on the inside of Ganyu's left arm from the rest her body, the game does not render it.
No Partial Lighting
You notice that when you step from light into any large shadow, such as a building, tree, or mountain, the character becomes fully engulfed in shadow. Even when standing on the edge of a shadow, it is not partially cast on the character. This is difficult to emulate in Blender, but an important point to the game's rendering method nonetheless.
2 – Artificial Subsurface Scattering
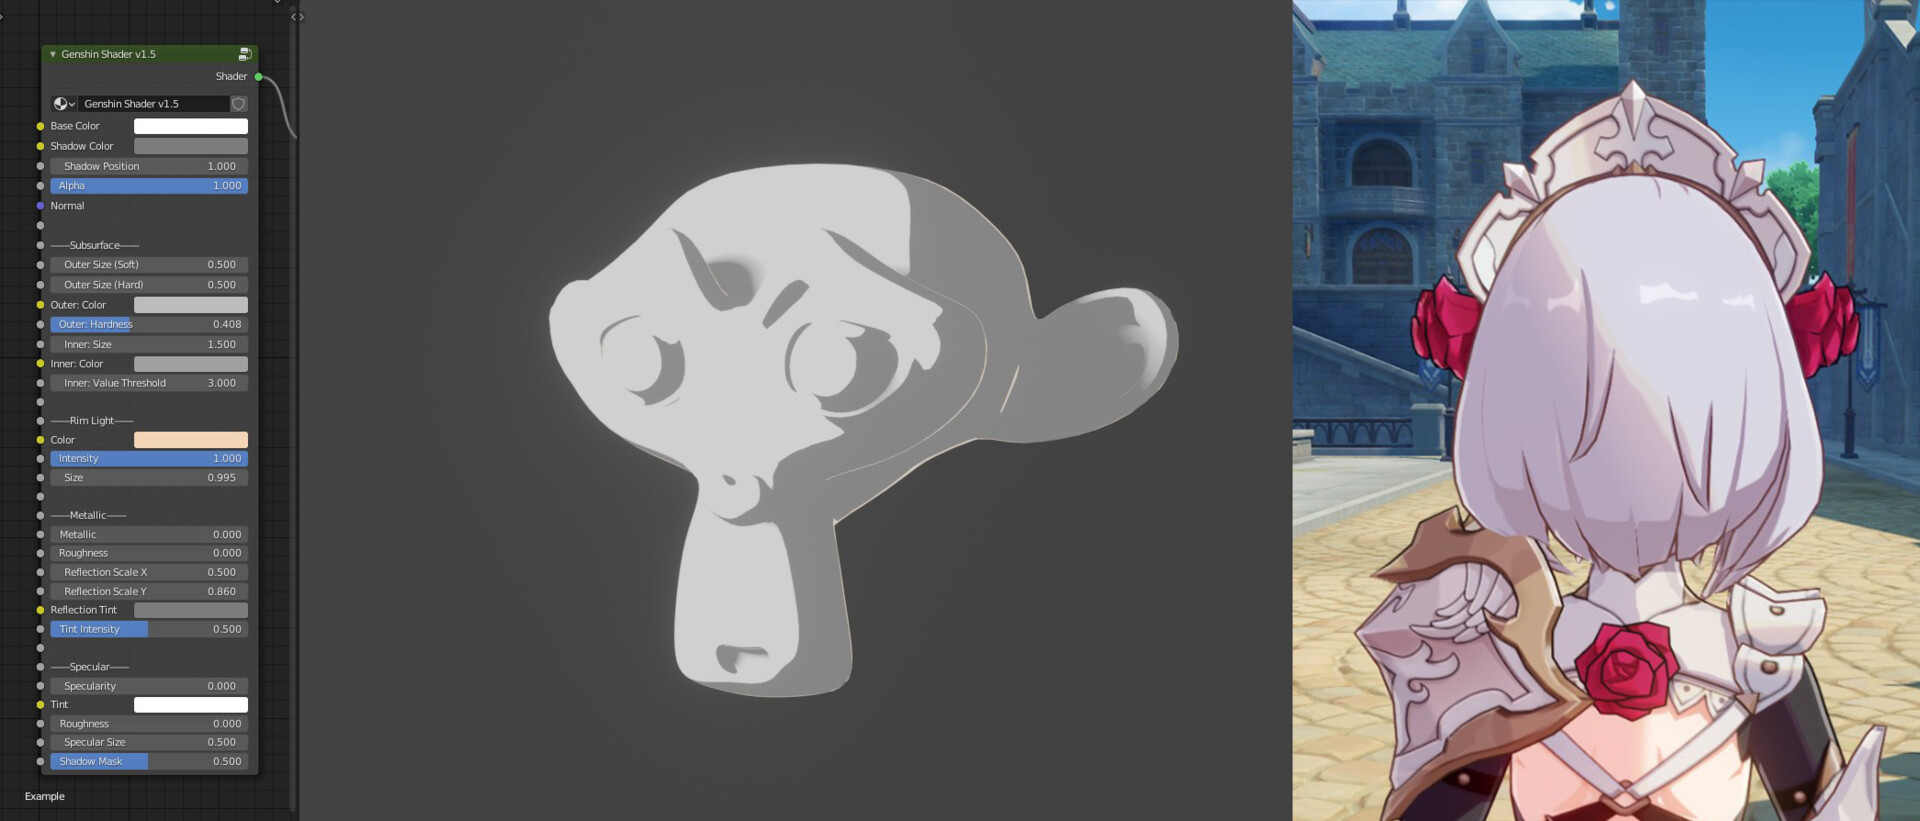
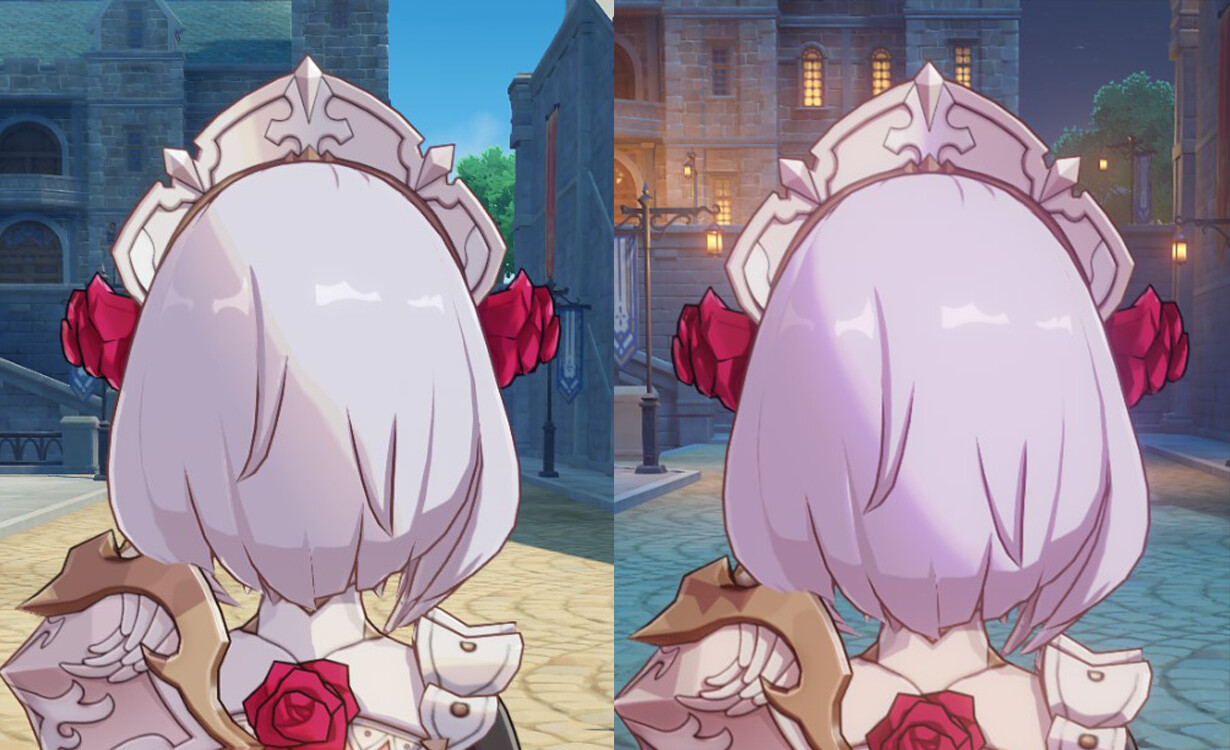
Something that makes Genshin's shader rather unique compared to other NPR shaders—and in my opinion, is the main ingredient—is its artificial subsurface scattering (SSS) on either side of the shadow. If you look carefully on Noelle's hair (left), you can see a faint yellow gradient on the edge of the shadow in the light and a faint red gradient inside the shadow. Additionally, there is a notable difference between daylight and night lighting (right).
This creates a very artificial and performant effect of subsurface scattering. Internally, the game uses shadow ramps for each character to determine the colors of these gradients, but because my shader node tree is intended to be usable on original models with maximal art direction ability, I opted to allow each color to be changed individually.
3 & 4 – Metals and Specularity
In other words: reflectivity. These two really go hand-in-hand in most cases, but are separate in others. Metallic objects and details have several characteristics to pay attention to, and specularity supplements it to give an extra kick. Specularity is also found on some non-metallic materials like Xiao's shirt. Both metal and specular have variable levels of roughness.
Let's take a look at the parts:
Metal Matcap
To achieve those crisp reflections in metallic objects, the game appears to use a form of matcap alongside a real-time specular shader (more on that next). Because matcaps are often seen in their truest form when displayed on a sphere, the Solar Pearl catalyst makes a great example of this. Once you see it, you may be able to make it out in other objects as well.
My shader uses a very similar matcap, but it is generated entirely using Blender's nodes, so an external texture to keep up with isn't necessary. It also supports roughness adjustments, which can be seen on some characters, such as Noelle (above)—plus it's nice to have in your original character renders.
Artificial Normals
While real normal maps do exist internally for other objects in the world, the character shader appears to work rather differently. Strictly speaking, these are not "normal maps," nor are there many examples of this shading behavior, but it is, nonetheless, yet another unique ingredient that makes the Genshin shader as beautiful and dynamic as it is—miHoYo's attention to detail is truly stunning. Pay close attention to the way the scale pattern on Zhongli's coat is shaded as the camera rotates.
Can I replicate it, then? After a quick bout with Substance Designer to make a similar scale pattern and simply hooking it up to the matcap scale with a color ramp, it turned out better than I expected. Aside from the color mismatch and only spending about 10 minutes on it, it's not too bad!
That said, my Genshin shader does support normal maps if you need them. After all, you can still use them to get a similar effect as above in many cases.
Hair Shine
This is where specularity really—*ehem*—shines (sorry). Each character's texture has those signature anime-like hair shine marks, but they are also used as a mask for a seemingly real-time specular—look carefully, now!
5 – Outlines
Genshin characters all have a thin, dark outline around them. It can be difficult to see with a lot of detail, but they all have them—some materials even colorize the outline slightly to better match the color of the material.
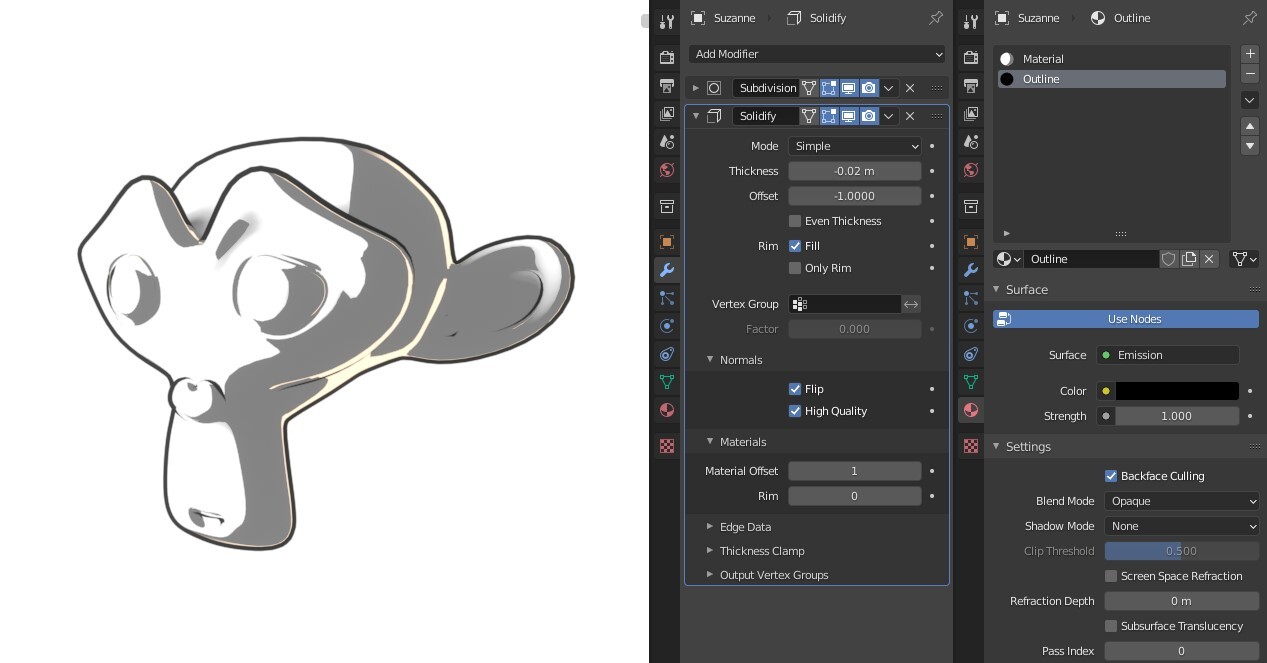
This outline is real-time geometry and is easily recreated in Blender with the Solidify modifier. To add a real-time outline, just (1) make a second material slot after each base material with an outline material, (2) add an emission shader to the outline material, tick "Backface Culling", and set the shadow mode to "None," (3) then apply an outline modifier, set the thickness to a negative value, tick flip normals, and set the material offset to "1". Note that you will need to place an outline material slot after each material slot if your mesh uses multiple materials. This method is often referred to as an "inverted hull."
6 – Rim Lighting
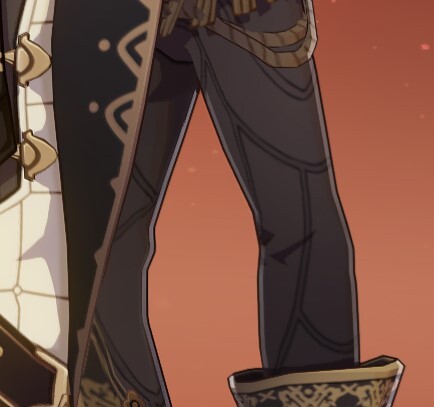
This one is a bit of a peculiarity, both in-game and with my shader. Before we get into it, take a look at Diluc's outfit below, where this "rim light" can be seen rather well along the edges:
If you look very closely, you might also notice this isn't really a real-time rim light due to several factors: it's on both sides of the object, it doesn't conform to the mesh, and it is an even thickness. It actually looks more like an outline than a real rim light, but certain parts of it on some characters do look more natural than others.
My shader offers support for real-time rim lights that are masked by shadow, but upon looking closely, you might notice they look a bit different from the game.
This is because creating rim lights most closely mimicking Genshin can only be done with compositing for the time being, and I wanted the shader itself to be all-encompassing and accessible without requiring any knowledge of post-processing to achieve a similar effect.
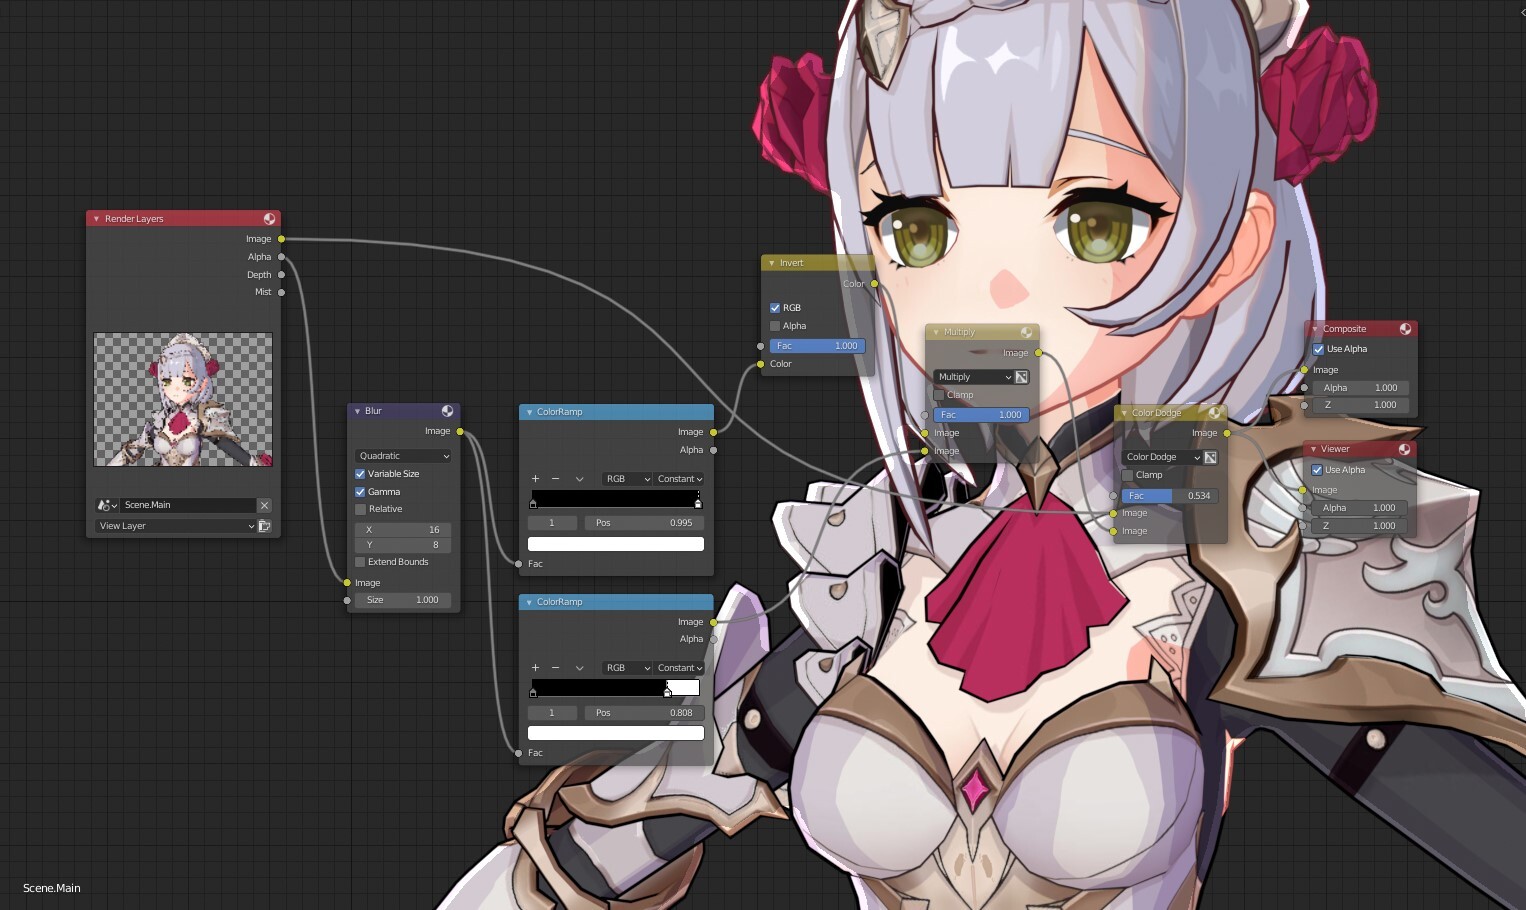
How to Create the Rim Light with Compositing
A quick solution to this problem is this small node tree (with Noelle as an example). (1) First, make sure the film (background) is transparent and you can use the Alpha render layer (or make other creative use of render layers if you cannot have a transparent film). (2) Blur the alpha layer along the X coordinate (I like to use a smaller blur amount on Y). (3) Create two color ramps: one to serve as the inside of the outline and another to serve as a mask right up to the outline created with the Solidify modifier. (4) Invert the former and multiply the masks together to get the outline. (5) Then, simply use a Color Dodge Mix node to mix the outline over the render. The result may not be exact, but it looks incredibly close to the game's shader—much more so than my shader's built-in rim light.
7 – Custom Normals
First, I want to take a moment to appreciate the superb, satisfyingly smooth shading on character faces and how it seems to "snap" to the most attractive spots.
Believe it or not, this facial shading actually isn't custom normals. It is a custom light map used in-engine that shifts and mirrors itself based on the direction the character is facing relative to the light source. That is one reason why faces do not use the artificial SSS detailed earlier while skin elsewhere on the body does. While this is possible in Blender (with quite a bit of work and math—or just some creative use of keyframes), you would need a light map for each character rig's face, which is either custom-made (a lot of texturing work) or datamined from the game—which I won't advise (but some can be found online).
While not quite the same, similar facial shading (and most other custom shading) can be achieved with custom normals, however, using Blender's "Data Transfer" modifier, but I will not go into detail about this one because it is relatively complex, different for every model, and might be its own tutorial in the future.
The Final Product
So what does it all look like put together? Well, you saw a glimpse of her already, but here is Noelle's official MMD model and textures shaded entirely in Blender with my shader and the aforementioned compositing using the above key elements. This .blend demonstration is included with the shader on my ArtStation store for educational purposes only, but note that the model belongs to miHoYo and is available for free on BiliBili—I don't claim to have made it or to own it.
Thanks for reading!
I hope you enjoyed reading my analysis of Genshin Impact's stellar graphics work! Keep creating and learning, and good luck with your future projects!
Once again, if you're interested, you can buy the shader for EEVEE from my ArtStation store: https://www.artstation.com/marketplace/p/9nrrR. It helps me tremendously and help me keep bringing you new content, resources, and tutorials in the future.
The product also includes a handbook with full documentation of shader settings, Blender settings recommendations, and additional tips and tricks to get a better render.
Disclaimers
Genshin Impact and its characters are property of miHoYo. Screenshots and gifs are taken from Genshin Impact. I do not claim to work for miHoYo, and this shader is strictly a fan work made for use on original personal projects.
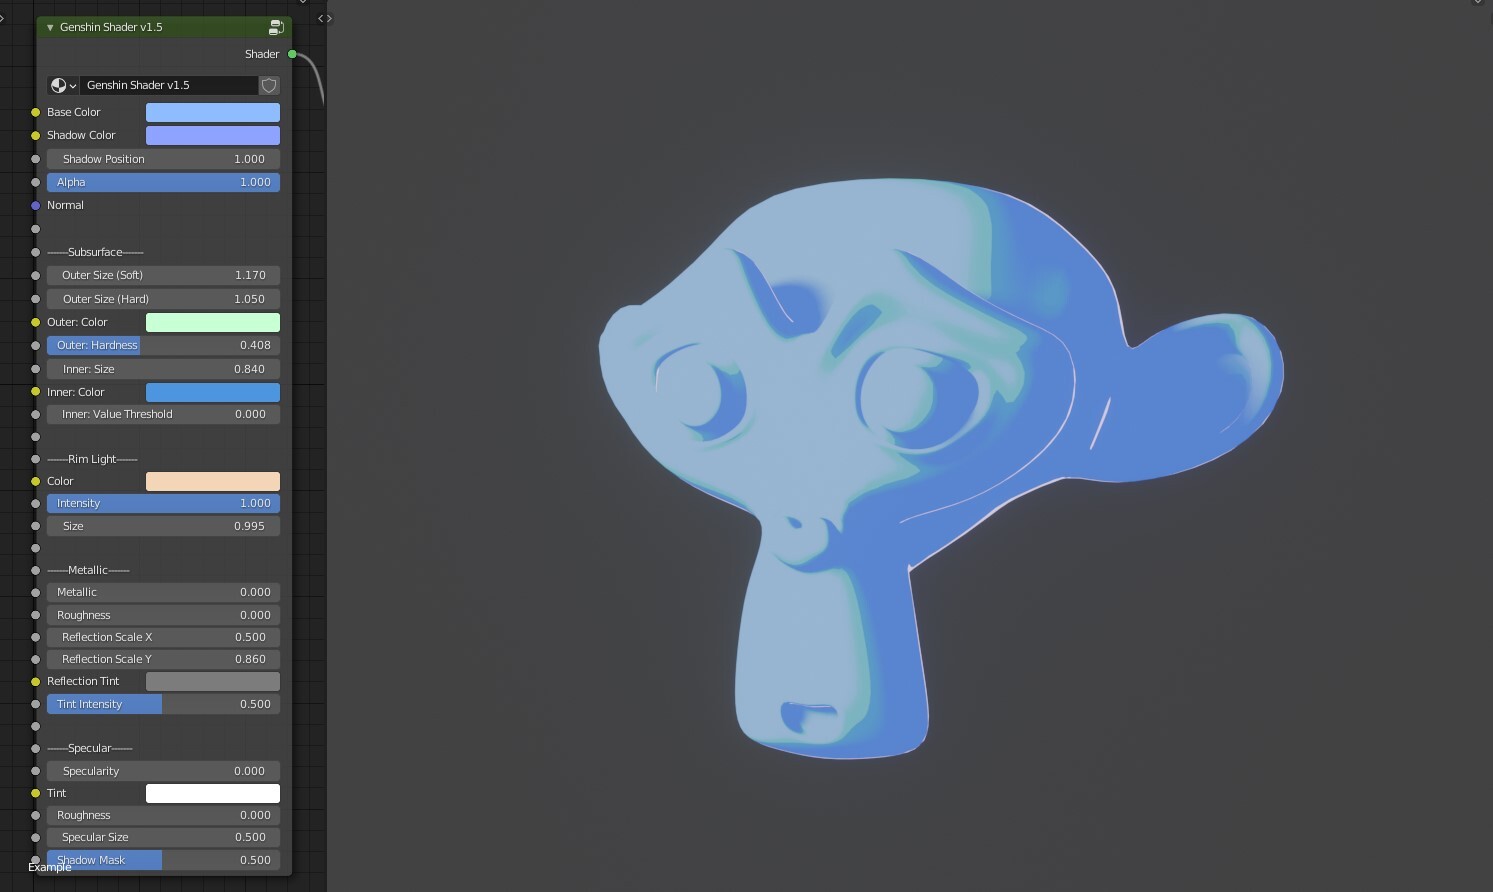
Blender screenshots were taken myself to demonstrate various capabilities of my Genshin Shader product.